Publishing your web app on the Chrome Web Store is so straight forward, not doing so almost seems foolish!
Create a zip file containing a folder “chrome_app” and inside that two files:
[code lang=”javascript” title=”manifest.json”]
{
"name": "Illyriad Test",
"description": "Real-time massively-multiplayer…",
"version": "1.0",
"app": {
"urls": [
"https://www.illyriad.co.uk/",
"https://uk1.illyriad.co.uk/",
"https://img3.illyriad.co.uk/",
"https://img4.illyriad.co.uk/",
"https://img5.illyriad.co.uk/",
"https://img6.illyriad.co.uk/"
],
"launch": {
"web_url": "https://www.illyriad.co.uk/loginOAuth.asp"
}
},
"icons": {
"128": "Logo-128.png"
},
"permissions": [
"unlimitedStorage",
"notifications"
]
}
[/code]
Your launch web_url should be either your login page, or if not required the main app page. If you do require a login page it’s also advisable to accept Google OpenId, at which point you can bypass the login page for CWS users who have a Google account and have approved you; but more on this in a later post.
To publish your app and access the developer dashboard a one-off developer registration fee of US$5.00 is required to verify your account, and presumably to cut down on spammers.
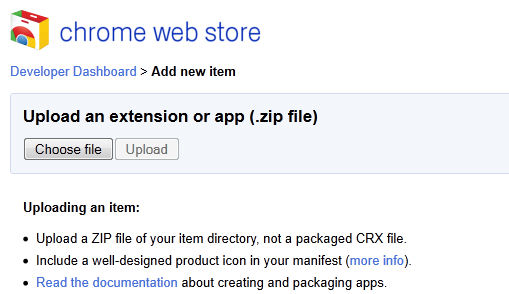
In the CWS developer dashboard click the Add new item button, which will take you to the upload app page:
![]()
Choose the zip file you created earlier and upload it:

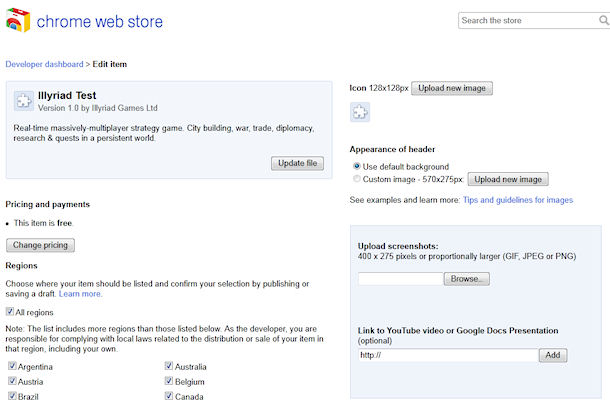
Once you have uploaded your zip you will be taken to the Edit item page. First thing to do is upload the Icon you used in the zip file (unless you want a different icon in the Web Store to the one to be displayed in Chrome)
Now you’ll want to marketing materials. You can choose at the bottom of the page “Save draft and return to dashboard” if you don’t have these ready yet, so you can return to editing later. The items you’ll want are:
- A detailed description (Focus on explaining what the item does and why users should install it)
- Some screenshots (400 x 275 pixels or proportionally larger)
- (Optional) A YouTube video
- (Optional) A background image to show on your app page
- (Optional) 2 promotional images
After adding these on the edit item page, choose a category to publish in and then click “Preview changes” to see what your item will look like. If you like it hit publish, else return to editing. At this point you are published! Easy!
There is lots more you can do, of course, you can publish to test users first, use a verified website, change your pricing – your apps don’t have to be free, you can change the pricing and also sell apps from the Web Store – it is a store after all! But this should get you on your way…

